Showing posts with label journaling. Show all posts

Monday, June 30, 2014

Journaling class


We've been journaling this semester. What fun! We started at Eileen's house and moved to LACMA. The students went where ever they wanted around the museum and we talked about the drawings and ways to improve their work.

Eileen's house


At LACMA


Next, Satomi's house. We did 5 minute contour drawings and 5 minute painting of antique art supplies. These turned out fantastic. Lunch was "asian."

At Satomi's


Contour drawing


Then we went to Linnea's place way up in Topanga. The cool things to draw at her house were fun but we were tackling perspective. As we've noticed, perspective is everything in drawing. It's definitely something we all need to work on. It's the thing I have the most trouble with. Lunch was "fiesta."

Linnea's house

Marjorie

Following, we drew at Val's house. She has wonderful eclectic artwork and a peaceful garden with a water fountain.  Of course we have lunch wherever we go, this day was "picnic."

Our last class found us at the wonderful Angelus Rosedale cemetery. I've driven past it a few times and think it's cool because it's very old and very crowded with every kind of monument you can imagine. Including at least 4 pyramids, many obelisks, Irish crosses, etc. we had a great time drawing and painting in Los Angeles oldest cemetery. It's the first one that allowed anyone regardless of race or religion. Other than the fact that they can't get enough water to keep the grass green, it was really beautiful, in a creepy way. I loved it. Then we all met at Langers Deli on Alvarado and 7th. Awesome! How lucky am I to have students willing to do this with me.

DeAnn

My view


DeAnn


DeAnn


Valeda

Caroline, Judith, Marjorie

Soldier section. I saw Spanish American War!


Linnea

Judy

Judy


More from DeAnn's art journal:


Sunday, September 19, 2010

Beverly Hills Journaling Class


Journaling Lesson Sequence and Thoughts

Illustration
So you’re not an artist. You don’t draw, paint, sketch, or even doodle well enough for a Post-It note. Have no fear. Your journals are an expression of your personal vision, private places to create as you see fit. Sometimes, it’s hard not to feel intimidated when you see other artist’s journals. Remember that your personal books are not finished artwork. They’re not about the results as much as they are about process. Your journals are along for the journey whether you’re the Da Vinci or, like the rest of us, your’re not.
Making Memory Books and Journals by Hand

Content

If you’re creating a journal specifically to document your personal history, you may find these types of books inspirational. Many contain s prompts to get the creative juices flowing . Try creating your own personal prompts such as the ones listed below. Keep your list somewhere in your journal to get you motivated when you find yourself staring at the blank page.
Once again, I don’t know what to write..
The last time this happened I….

This is who I am today…
This is what I did today….
This is what I like best/least about this (journal, pen, day, place, house, life, body)….
I keep journals because…
I wish I was…/ I’m glad I’m not…
If I could write in my journal to anyone it would be…
The next artistic technique I’m going to attempt in my journal is…..
The best thing about my journal is…

  1. Transfer Technique:
Materials needed: regular acetone, Chart-Pak burnisher, removable scotch tape, paper to use as a cushion, a glass container to put the acetone into. You must use a color or black and white Xerox or laser copy. It needs to be toner not from an inkjet printer. If the copy has lettering or needs to be printed in a particular direction then make the copy in the “mirror” image so when it prints it will be in the correct direction.
  1. Making a handmade journal. (closed: 5x7 or 8.5x11”)
Bring papers of different colors and textures also maps add a nice touch. We will combine them into a simple multi-signature binding. We will sew them with a 3-hole pamphlet stitch. I’ll bring some Tyvek to make the covers. If you have acrylic paint or ink, bring that with you along with large brushes and old credit cards or similar type tool to spread the paint. If you want thread that is colored bring that or embroidery thread. I have some colors and plain.
Pop-Ups

Thursday, September 16, 2010

Beverly Hills Journaling Class


This is the lesson sequence from last semester for the new students.

Journaling Lesson Sequence 


 There is no “must” in art, because art is free. Wassily Kandinsky

Material from Keeping a Watercolor Sketchbook by Brenda Swenson

Materials and Techniques to Try

  1. Water soluble pens.
Using Water-Soluble Pens. For these sketches, water-soluble pens are very useful. Once I’ve drawn the general shapes with this tool. I can wet the edge of my lines with a damp brush and easily create form and shadow. I can even go back and add more color with my pen if I want,
  1. Pencils, ink, watercolors, erasers; white plastic, kneaded eraser.
  2. Permanent pens keep your drawing from being affected by water.
  3. Colors; what paints are you using? Do you understand these paints?
  4. Sponges,
Color Study
What is value? It’s the way the eye reads light or dark. Most people are familiar with a gray scale of values, but colors also have a scale of tonal values. Yellows have the lightest hues, greens and reds have mid-range hues, and purples have the darkest hues. It’s easier to see values when squinting.

Saving and Retrieving Whites

Lifting color with masking.  Protect the surrounding color with artist’s tape, then lightly scrub with a damp sponge to remove color.
Lifting color without masking. Using a stiff brush loaded with clean water, gently scrub the paper to remove color.
Masking fluid. this rubbery substance can mask whites. Apply the mask, paint over it and then rub off the mask when the paint is dry.
Scraping with a razor. For small areas you can apply a razor to already-dried paint to gently scrape off lines of surface color.
Scraping with a knife. When damp paper has just lost its shine, you can use a palette knife to scrape off color.
Testing Transparency. Although watercolor is a translucent medium, not all paint colors are equally transparent. Knowing the strength of your colors’ transparency will help you predict how the colors will interact. Test each watercolor’s opacity by painting it over a dry band of water proof black ink. If the hue is visible on top of the line when the paint is dry, the color is opaque. You can also try overlapping different colors from you palette to avoid surprises when you combine the paints in your sketches.
            Overlapping Colors to Test Transparency. Colors that are more opaque than the yellow shown here (new gamboges) will seem to float above the yellow line, whereas colors that are more transparent will seem to sink below it. Even semi-opaque colors will appear transparent if diluted with enough water.
Glazing Colors. Because of their transparent nature, watercolors can be glazed on top of one another. The under-color will affect the top color, but the effect  varies depending on the transparency of the colors used. Paints with the same quality of transparency will produce more equal visual blends.
Granulating Colors. Certain pigment (such as manganese blue, raw sienna, and cobalt blue) granulate- meaning their pigments separate from the binder and settle into the grooves of textured paper. These colors can produce exciting effects, especially when depicting rusted metal, rocks, or wood. Experiment by mixing them with other colors or try them alone.
Mixing Greens. You may have already noticed that I don’t keep any green paints on my palette. I find that the ranges of greens I can mix with my existing colors are richer,m more varied, and more natural than those that come straight from the tube. Try mixing the blues and yellows from your palette to sample some of the many possible combinations.

Drawing what you see

There is a big difference between sketching what you actually see and sketching what you think you see. Because we have expectations about what we will see, in truth, we spend very little time looking. Take a few minutes to explore with your eyes. Don’t just register the objects around you , but look at their shape-or the many shapes that comprise one object. Notice how light affects the edges of objects,, and pay attention to whether the shadows are long or short. Then note if the colors are bright or muted.  If you take the time to slow down enough to really look at the world around you, you may find that you begin to see things in a different way-and you may even see some things for the very first time!

Simplifying Objects into Shapes and Forms

Every object is a three-dimensional form based on some combination of four basic geometric shapes the circle, oval. rectangle and triangle. Learning to see and recognize the shapes and forms in the objects surrounding you in essential if you want to create realistic sketches. It’s much easier to depict an object once we are able to break it down into simple shapes and forms!

Shapes-Forms

Circle-Sphere
Oval-cylinder
Rectangle-Cube
Triangle-Cone

Try turning everything into these elements. Combine these elements to become your subject.
Contour Drawing
Contour drawing is an excellent way to exercise your observation skills because it forces you to slow down and concentrate on the subject at hand. To create a contour drawing, first acknowledge the overall shape of your subject; then concentrate on one edge-or contour-at a time, To make a contour drawing carefully draw each edge as you follow it with your eyes, Focus on one edge at a time and draw exactly what you see. There’s beauty in a well-done line drawing.
If you would like to challenge yourself, you can also try making a continual-line contour drawing. With this approach, you draw the entire subject entirely without ever lifting your pen. Find a starting point. place your pen on the page and begin drawing the outline of your subject. Don’t pick up the pen until you have finished. The subject usually becomes a little distorted when working this way, but I think of the distortion as part of the charm.
Contour drawings are direct and honest representations of what you see-and they allow you to say so much with so little!

Recording Details
Break a scene down from a large to a small detail. Instead of drawing the whole valley of wildflowers, pick a few single blossoms to render.
Working in Monochrome
I typically draw with a colored water-soluble pen, pulling color from the line to lightly tint the paper. In the darker passages, I use the pen alone, without diluting the ink with water. You can also approach a monochromatic study by drawing the scene in pencil or pen and then tinting the paper with any one watercolor hue.
Monochromatic sketches done in sepia or burnt sienna have an old-world feel, similar to that of a tinted photo from long ago.
Simplifying with Vignettes
 The vignette is an open format that keeps information out of the corners and touches the border in only two or three spots. The uncomplicated design give the sketch a somewhat unfinished appearance, allowing a more spontaneous approach, I typically limit myself to four colors when working in a vignette format-applying a simplified palette to a simplified format. Try putting an outline around the drawing. (framing)

Finding the Best Format

Square, Vertical, Horizontal (both rectangles). Panarama rectangles(high contrast ratio); vertical and horizontal

Choosing a Viewpoint

Eye level, Bird’s eye view (above eye level), Worm’s eye view (below). These distinct viewpoints can add a more dramatic feel to even the most ordinary subjects. To experiment with points of view place your horizon either lower or higher on your page; then alter the angle-or perspective-accordingly, as shown in the examples here. You’ll often find that artists use more exaggerated points of view when painting landscapes and city scenes but still lifes and interiors can benefit from a slightly different perspective as well.

Rearranging Elements

Be willing to edit what you’re drawing and combine things that don’t necessarily really exist. Take a little of this and a little of that and combine them into one drawing or painting. Or make a Visual Collage of multiple images onto one page.


Color Awareness

It’s a good idea to make your own color wheel, so you can experiment with the color and how to mix different hues.

Warm and Cool Colors

Choosing colors isn’t just a matter of replicating what you see; colors possess an emotional quality that should also be taken into account. For example, warm colors (yellows, oranges and reds) emit life, energy and strength; whereas cool colors (greens, blues and purples) evoke quietude, tranquility, and serenity. You can use the inherent emotional aspects of colors to your benefit by exercising “temperature dominance.” Before you begin painting, first determine whether the mood you want to express is warm or cool; then let that choice guide your color selection.


Placement and Style of the Writing

You need to find a style of writing that is easy to write but is “easy” on the eye. When there lettering that is evenly spaced and enough light throughout it is more pleasing to look at on the page. Consider where you do the illustration and where you arrange the writing. I have an “italic” style and a “copperplate” style to choose from. It needs to be very evenly spaced so it compliments the drawing. You don’t want it to create dark spots on the page, it makes it too chaotic.
You need to learn to combine the illustration and writing in a harmonious way. Some of the ways to do this is to draw with the pen that you do the writing. At least include some strokes with the same tool that you will be writing,. Another technique is to put some of the color from the drawing into the writing. I like to put a brush stroke of one of the colors under the initial capital letter of the writing. Somewhat like an illuminated manuscript would start with the decorated capitals.
Composition of illustration and writing
  1. Picture with captions
  2. Picture with wrap-around text.
  3. Writing with picture drawn or painted on top.
  4. Picture with writing on top.
  5. Columns of writing with picture.


Painting is just another way to write in a diary. Pablo Picasso


Saturday, April 3, 2010

Spring Calligraphy Classes Are Starting!

Copperplate Calligraphy
Beverly Hills Adult School 
April 5-June 7th.  10-1pm
Level: Beginning and/or Intermediate
9 weeks approx. $100
701 Whittier Drive
Beverly Hills, CA 90210
Map

Copperplate calligraphy is a style of cursive calligraphy. 
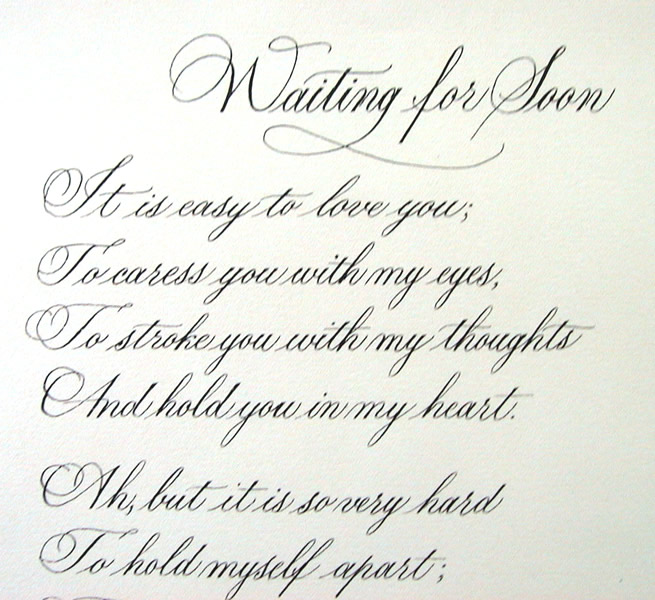
Unlike broad pen calligraphy styles, copperplate uses a pointed calligraphy pen. Copperplate alphabets are determined by the pressure applied to the pen. The more pressure applied in the copperplate style, the thicker the stroke. The hair-line strokes produced, contrasts beautifully with the thicker downward strokes.
Materials List


Journal Your Vacation and Special Events
Beverly Hills Adult School 
April 5 - May10th  1:30-3:30
6 weeks approx. $90. 1:30-3:30
701 Whittier Drive
Beverly Hills, CA 90210
Map

Have you ever wanted to journal some of your vacations or special events? You’ll learn how to draw and write what you see. You don’t have to draw well to journal. We will create drawings, paintings, collages, and use other interesting techniques to add to your pages. You will be taught enough to get started on your journal. If you already journal, you can work on improvements or just get new ideas to make your journal better.
Materials List

Beginning and/or Advanced Calligraphy Classes
Emerson Adult Learning Center
April 6th-May 25th
Beginning 9:30-11:30am    
Intermediate / Advanced 12:00-2:00pm  (some calligraphy experience needed)
8 classes approx. $80
8810 Emerson Ave.
Westchester, Los Angeles
Map

Many styles of calligraphy will be taught, including Roman Capitals in pencil and pen. Small classes with a maximum of 10 students per class.
Call to register: 310.258-2000
Materials List (TBA)

Calligraphy Classes
Stampin' from the Heart
CALL  310.391.0466
11720 Washington Place
Los Angeles, CA 90066
Map

Calligraphy classes for students of all levels and continuing studies.  Stampin from the Heart Classes begin on April 7th.  You can buy 6-10 lessons for $20 per lesson ($120. for 6 lessons, $200. for 10 lessons for the semester.
All calligraphic subjects, including illuminated manuscripts will be covered. Maximum of 10 students.
Materials List (TBA)


Uncial
Rand Corporation
Thursdays  5:30-7:30pm (6 weeks - $72)
Class begins April 29th
Space is limited
For more enrollment information, contact: shirleycromb@hotmail.com

Uncial is a beautiful majuscule script (written entirely in capital letters) with a broad pen.  It was commonly used from the 3rd to 8th centuries AD by Latin and Greek scribes.  It was brought to Ireland and England in the 5th century and was used on some stunning illuminated manuscripts, including the Book of Kells.
Materials List (TBA)

Friday, January 29, 2010

Journaling at Bev Hills

See the June 2009 posting that's titled "Picture of Journaling Materials"

Beverly Hills Adult School

701 Whittier Dr. Beverly Hills

310-551-5150

Journal your vacation or special events

Have you ever wanted to journal some of your vacations or special events? I’ll

show you what I use and how to draw and write what you see. You don’t have to

draw very well to do journaling. We will use some drawing, painting, collage, and

other interesting techniques to add to your pages. Call the school to register Material List Follows

Mondays; January 25, February 1, February 22, March 1st 2010

1:30-3:30 pm

Journal your vacation or special events

In 4 two hour classes, we will learn enough to get started on our journals. If you already

journal we can work on improvements or just get new ideas to make it better. We will

schedule some classes later to continue improving your journaling skills such as; mixing

colors, how to draw what you see, how to draw quickly and polishing-up your illustration

techniques.

Materials needed:

1.Fanny pack

2.Small watercolor set that is meant for outdoor painting.

There are many brands, some are as cheap as $16. They generally come with a pointed

watercolor brush. I use a Windsor and Newton Cotman set with 12 colors. If a brush is

not included bring a Windsor and Newton Series 707 size #3 sable brush.

3. Small jar

1 oz. size, something like a little honey jar or jelly jar from a restaurant. This needs to be

water-tight. Put into a small zip lock bag till you know for sure if it’s water-tight.

4. Small container with water (1oz.)

5. Journal that will fit into fanny pack

I like a 5x7 with black hard cover and spiral bound. It usually has paper suitable for

sketching but will take watercolor. Canson and Strathmore make journals. Bring what

you have and we’ll see what works best.

6. A waterproof fine tip black pen. I use Zig Millenium black .01 pen or

Micron Pigma .01 or similar tool

7. A mechanical pencil that the lead can be retracted to keep a tip. It can be

HB or 2H lead

8. Small blunt tip scissors

9. Glue stick


Wednesday, September 2, 2009

Friday, August 28, 2009

Complete Schedule for the upcoming semester

Continued Studies 

(All Levels Welcome) 
Stampin’ from the Heart 
(Rubberstamp store) 
11720 Washington Place 
LA CA 90066 310-391-0466 
Beginning and continuing studies. 
For info and exact dates see 
Begin Sept. 23, 2009 Wed nights 7pm-9pm

Classes are $20 per class with a minimum
commitment of 6 weeks. You can pay for as many classes as you would like to commit to up to 10 classes. This class is considered “guided studies” so you can learn at your own rate. I will teach the letterform and give assignments and correct homework. Choose the subject and the project.
12 students maximum 
Contact the store at 310-391-0466 

Private classes 

Located at my home studio 
$35 per hr–learn at your own pace. 
See my website for more details: 

Beverly Hills Adult School 

701 Whittier Dr, Beverly Hills 
310-551-5150 
Fall semester begins 
Monday, September 14, 2009 10 weeks
Intermediate & Beginners 10-1pm 
NEW CLASS OFFERING  "Improve Your Handwriting"  2-4pm  6 weeks
Watch for NEW CLASS OFFERING "Continuing Journaling class." It was a very successful class and we would like to schedule more classes.
Emerson Adult Learning Center 

8810 Emerson Ave., 
Westchester, 310-258-2000 
Beginning class 9:30am-11:30 am
12-2pm NEW OFFERING  "Intermediate, Advanced Class" Finally an opportunity for students to participate in an advanced class with cooperative assignments and collaborations. We can move forward into some advanced concepts and achievements. This will be a real joy to all students. 
September 2009

11 Friday, San Diego Lecture Advanced Class Book Project
12 Sat, workshop Monoline and Watercolor Fun (San Diego Calligraphy Guild)
13 Sun, 9-4:30 Monoline And Watercolor Fun
 14 Monday, Beverly Hills (1) 2 classes 10-4 pm
 21 Monday Bev Hills (2) ) 2 classes 10-4 pm
22 Tuesday, Westchester (1) 2 classes 9:30-2pm
23 Wednesday,  Studio, Stampin from the Heart (1)

28 Holiday Yom Kippur
29 Tuesday, West (2)2 classes
30 Wednesday, Studio (2)
October 2009

5 Monday, Bev Hills (3) ) 2 classes 
6 Tuesday Westchester (3)2 classes
7 Wednesday, Studio (3)

12 Monday, Bev Hills (4) ) 2 classes 
13 Tuesday Westchester (4)2 classes
14 Wednesday, Studio (4)

19 Monday, Bev Hills (5) ) 2 classes 
20 Tuesday, Westchester (5)2 classes
21 Wednesday, Studio (5)

26 Monday, Bev Hills (6) ) 2 classes  LAST CLASS FOR HANDWRITITNG
27 Tuesday, Westchester (6)2 classes
28 Wednesday, Studio (6)
 November 2009
2 Monday, Bev Hills (7)
3 Tuesday, Westchester (7)2 classes
4 Wednesday, Studio (7)

9 Monday, Bev Hills (8)
10 Tuesday, Westchester (8)LAST DAY2 classes
11 no class Veteran’s Day

16 Monday, Bev Hills (9
17 Tuesday, Westchester (1)2 classes
18 Wednesday, Studio (8)

23 Monday, Bev Hills (10) ) LAST DAY
24 Tuesday, Westchester (2)2 classes
25 No Class for Thanksgiving
 December 2009

1 Tuesday, Westchester (3)2 classes
2 Wednesday, Studio  (9)

8 Tuesday, Westchester (4)2 classes
9 Wednesday, Studio  (10) LAST DAY
 January 2010

11 Monday, Bev Hills (1) ) 2 classes 
12 Tuesday, Westchester (5)2 classes
13 Wednesday, Studio (1)
 18 Monday, Martin Luther King Day

19 Tuesday, Westchester (6)2 classes
20 Wednesday, Studio (2)

25 Monday, Bev Hills (2) ) 2 classes 
26 Tuesday, West (7) LAST DAY2 classes
27 Wednesday, Studio (3)
 February 2010

1 Monday, Bev Hills (3) ) 2 classes 
3 Wednesday, Studio (4)
 8 Monday, Lincoln Holiday

9 Tuesday, Westchester (1)2 classes
10 Wednesday, Studio (5)

11 Thursday, Letters California Style Set Up
12 Friday, Letters California Style Gothic Textura
13 Saturday, Letters California Style Gothic Fraktur
14 Sunday, Letters California Style Gothic Rotunda
15 Monday, Letters California Style Quills And Reeds

15 Monday, Washington Holiday
16 Tuesday, Westchester (2)2 classes
17 Wednesday, Studio (6)

22 Monday, Bev Hills (4) ) 2 classes 
23 Tuesday, Westchester (3)2 classes
24 Wednesday, Studio (7)
 March 2010

1 Monday, Bev Hills (5) ) 2 classes 
2 Tuesday, Westchester (4)2 classes
3 Wednesday, Studio (8)

8 Monday, Bev Hills (6) ) 2 classes  LAST CLASS FOR HANDWRITITNG
9 Tuesday, Westchester (5)2 classes
10 Wednesday, Studio (9)

15 Monday, Bev Hills (7) LAST DAY2 classes
16 Tuesday, Westchester (6) 2 classes
17 Wednesday, Studio  (10) LAST DAY

23 Tuesday, Westchester (7) ) LAST DAY2 classes
April    2010

5 Monday, Bev Hills (1)2 classes
6 Tuesday, Westchester (1)2 classes
7 Wednesday, Studio (1)

12 Monday, Bev Hills (2)2 classes
13 Tuesday, Westchester (2)2 classes
14 Wednesday, Studio (2)

19 Monday, Bev Hills (3)2 classes
20 Tuesday, Westchester (3)2 classes
21 Wednesday, Studio (3)

26 Monday, Bev Hills (4)2 classes
27 Tuesday, Westchester (4)2 classes
28 Wednesday, Studio (4)
May   2010

3 Monday, Bev Hills (5)2 classes
4 Tuesday, Westchester (5)2 classes
5 Wednesday, Studio (5)

10 Monday, Bev Hills (6)2 classes
11 Tuesday, Westchester (6)2 classes
12 Wednesday, Studio (6)

17 Monday, Bev Hills (7)2 classes
18 Tuesday, Westchester (7)2 classes
19 Wednesday, Studio (7)

24 Monday, Bev Hills (8)2 classes
25 Tuesday, Westchester (8) LAST DAY2 classes
26 Wednesday, Studio (8)

31 Monday, Memorial Day

 June  2010

2 Wednesday, Studio (9)

7 Monday, Bev Hills (9) LAST DAY2 classes
9 Wednesday, Studio (10) LAST DAY
 September

 13 Monday, Beverly Hills (1)
14 Tuesday, Westchester (1)
15 Wednesday, Studio (1)

20 Monday, Beverly Hills (2)
21 Tuesday, Westchester (2)
22 Wednesday, Studio (2)

27 Monday, Beverly Hills (3)
28 Tuesday, Westchester (3)
29 Wednesday, Studio (3)
 October

4 Monday, Beverly Hills (4)
5 Tuesday, Westchester (4)
6 Wednesday, Studio (4)

11 Monday, Beverly Hills (5)
12 Tuesday, Westchester (5)
13 Wednesday, Studio (5)

18 Monday, Beverly Hills (6)
19 Tuesday, Westchester (6)
20 Wednesday, Studio (6)

25 Monday, Beverly Hills (7)
26 Tuesday, Westchester  (7)
27 Wednesday, Studio (7)
November

1 Monday, Beverly Hills (8)
2Tuesday, Westchester (8) LAST DAY
3 Wednesday, Studio (8)

8 Monday, Beverly Hills (9)
10 Wednesday, Studio (9)

15 Monday, Beverly Hills (10) LAST DAY
16 Wednesday, Studio (10) LAST DAY
Fall Semester
BH = 10 classes
West = 8 classes
Winter
BH = 7 classes
West (Nov 22)=7 classes

Monday, June 29, 2009

Journal Class first lesson


Have you ever wanted to journal some of your vacations or special events? I’ll show you what I use and how to draw and write what you see. You don’t have to draw very well to do journaling. We will use some drawing, painting, collage, and other interesting techniques to add to your pages.


What is a sketchbook journal? As the name suggests, it is a book usually bound, containing both sketches and bits of personal history and observations. More than a diary of written words, it is an outlet for visual expression and artistic creativity. Where words leave off, the sketchbook journal awakens the mind with shapes, colors and textures, all seen through the eye of the recorder and preserved in his own personal style.
As a very personal work, your sketchbook journal need not be shared with everyone. It is not a mini-gallery open to public critique, but rather a safe haven where the creative mind is allowed to express, experiment, discover, document and dream, with no thought of pleasing others. Therefore, one should never apologize for the art or thoughts contained within. Rarely are the sketches contained in a journal the recorder’s best art. The sketches are often quickly made; if they catch the essence of a memory, they have done their job. Only the illustrations in an in-depth study journal need be as detailed and precise as possible.
Within the pages of this book, I have shared many entries based on my personal memory and sketchbook journals. Some of the illustrations are detailed and elaborate, reflecting days when I had plenty of time and interest to devote to the subject; other sketches are mere scribbles. Nevertheless, each one reminds me of a specific subject or experience and is therefore adequate. The written journal entries are penned in uppercase block letters so that you can distinguish them from the other text. Any idiosyncrasies or unique spellings in the journal pages add to the inherent integrity of the artwork and should be enjoyed as such. They only enhance the work and make it more personal.
It is my hope that this glimpse into the pages of my life, as well as the instruction and advice contained within this book, may inspire you to begin your own sketchbook journal. Remember that there is no greater way one can celebrate life than to create a legacy of memories.
How to Keep a Sketchbook Journal by Claudia Nice

First we will learn the monoline italic version that is a clean, easy to write and read style that will record your thoughts.
Next, we’ll learn some techniques of drawing that is natural, for you individually.

Lesson Sequence

Lettering
Exemplar: Monoline
1. Practice the lowercase either straight up or on a slant. Do what is natural to your own hand.
Practice letter by letter in the letter families. Letters are about 1/2 as wide as they are tall. Keep the letters kind of sharp and triangular instead of round. Only practice each letter 3 times then move on to the next. Be sure to look at the examples between each time that you write so you are sure to write the “correct” forms.
2. Practice writing words using “picket fence” spacing. ALL THE WHITE SPACES ARE THE SAME, INSIDE THE LETTER AND BETWEEN THE LETTERS. Really!!!! They are supposed to be the SAME!!!!!! This gives an overall gray color to the full page.
3. Capitals
Again, practice each one 3 times at a time. Look at the exemplar each time.
4. Choose whether to use plain or decorative capitals. You can combine some plain some decorative. Make some Large and some small. Just look at the overall design and decide as you go along.
 Illustration
There are many ways to illustrate. We will start with drawing.
Next we’ll cut out interesting things and glue them to the page in an interesting way. Use a glue stick. Typically a UHU is acid free, but others are also. Use watercolors, pencils, watercolor pencils to make squiggle borders and little colorful marks around the pictures.
Today we picked some foliage from outside. Purple and orange flowers, green leaves were some of the material we used to mix colors. Using the color palettes that were in our paint box we tried to mix the exact same colors that were found in the materials. It teaches us how to put color together to make different hues. Then we drew the flower or leaf and colored it with the colors we mixed. It's also fun to write calligraphy with the colors that you mixed. We painted swatches onto the paper until we got the color that we were comfortable with. 
The homework assignment was to write something about what we did in the class today. Also, to write in the journal everyday. You can draw anything, from the pen that sits on the table to scenery outside the window. The more you practice the more you will get in touch with "your personal style". It takes awhile to get a "feel" for your "style". Give yourself the practice and time to figure it out. The more you practice the letterforms the better you will get with the rhythm. I had so much fun today, but I was really tired when I got home. Were you? I can't wait to sit down and do some journaling. I'm going to Ojai, so I'll draw when I go there. I hope you have a great week! Remember to bring your camera if you have one. It's great to take pictures of others work and pictures in books.
Here are the books in the library I brought to class today
Books that I used for reference;
Drawing Made Easy     by David Sanmiquel ISBN 0-8069-6927-X  Sterling Publishing
The Natural Way To Draw     by  Kimon Nicolaides  Houghton Mifflin Company, Boston
Perspective Made Easy   by Ernest R Norling
The Pleasures of Gardening  by Angelea Stanford  ISBN 0-7683-2353-3
CEDCO Publishing
Watercolor Journeys Create your own travel sketchbook by Richard Schilling
ISBN 1-58180-272-2 North Light Books
The Watercolorist’s Nature Journal How to create a personal record of the natural world around you.  by Jill Bays ISBN 07153 1147-6  David And  Charles
Create Your Own Artist’s Journal by Erin OtToole ISMB 1-58180-170-X
How to Keep a Sketchbook Journal by Claudia Nice
Artful Journals Making and Embellishing Memory Books, Garden Diaries And Travel Albums by Janet Takahashi ISBN 13: 978-1-60059-069-6 Lark/Chapelle Books
Italic Letters Calligraphy & Handwriting by Inga Dubay and Barbary Getty Revised Edition Portland University Continuing Education Press ISBN: 0-87678-091-5

Sunday, June 21, 2009

Monday, June 15, 2009

Material List and description of journal class

Beverly Hills Adult School Summer Registration June 12, 2009
701 Whittier Dr. Beverly Hills
310-551-5150
www.beverlyhills.k12.ca.us Journal your vacation or special events
Have you ever wanted to journal some of your vacations or special events? I’ll
show you what I use and how to draw and write what you see. You don’t have to
draw very well to do journaling. We will use some drawing, painting, collage, and
other interesting techniques to add to your pages. Call the school to register and
get material list. Or go to designingletters.com
2 four hour classes
Monday June 29 and July 6th
10-2pm 10-2pm 4 hour class
Journal your vacation or special events
In two 4 hour classes, we will learn enough to get started on our journals. If you already
journal we can work on improvements or just get new ideas to make it better. We will
schedule some classes later to continue improving your journaling skills such as; mixing
colors, how to draw what you see, how to draw quickly and polishing-up your illustration
techniques.
Materials needed:
1.Fanny pack
2.Small watercolor set that is meant for outdoor painting.
There are many brands, some are as cheap as $16. They generally come with a pointed
watercolor brush. I use a Windsor and Newton Cotman set with 12 colors. If a brush is
not included bring a Windsor and Newton Series 707 size #3 sable brush.
3. Small jar
1 oz. size, something like a little honey jar or jelly jar from a restaurant. This needs to be
water-tight. Put into a small zip lock bag till you know for sure if it’s water-tight.
4. Small container with water (1oz.)
5. Journal that will fit into fanny pack
I like a 5x7 with black hard cover and spiral bound. It usually has paper suitable for
sketching but will take watercolor. Canson and Strathmore make journals. Bring what
you have and we’ll see what works best.
6. A waterproof fine tip black pen. I use Zig Millenium black .01 pen or
Micron Pigma .01 or similar tool
7. A mechanical pencil that the lead can be retracted to keep a tip. It can be
HB or 2H lead
8. Small blunt tip scissors
9. Glue stick
I will show a photo of materials on my website designingletters.com so you can see
what everything looks like. I will post some pictures of journaling examples on the
website or on my blog site: DeAnnSinghCalligraphy.blogspot.com. The blog will have
current and up-to-the-minute information.
I will put pictures of materials and examples on my website and blog site.