
Beverly Hills Adult School Class #2: Today DeAnn demonstrated the lower case Fraktur letters. She collected homework at the beginning of class. She highly recommends turning in homework so that she can correct and return it to you. If you haven’t done any at home, you can turn in the practice sheet you did in class.
The Bienfang paper (with the light blue lines) may bleed when you write, especially at the 5mm size. Use pounce (DeAnn has it available for the class) to fix bleeding. Pounce can also erase fingerprints. It’s often used on envelopes that are difficult to write on.

DeAnn reviewed the basics of pen angle and lining the paper.
Pen Angle: A pen angle of 0-degrees creates the thickest down-stroke the Brause chisel point nib can make. It also makes the thinnest cross-stroke (horizontal stroke). A pen angle of 90-degrees creates the thinnest down-stroke and thickest cross-stroke. The pen angle for Fraktur is 45-degree, which makes the down-stroke the same width as the cross-stroke. To keep the vertical strokes the same width, don’t turn your wrist at all during the down-strokes. Move your whole arm. Using your left hand (non-writing hand) as a weight will enable you to freely move your right hand/arm (writing hand).
Lining the grid paper: Using the 18” C-thru ruler easily creates a 2-inch margin on each side of the 17x22 sheet. By placing it in the middle, you don’t have to move it back & forth, just downward as you draw the lines with a sharp pencil.
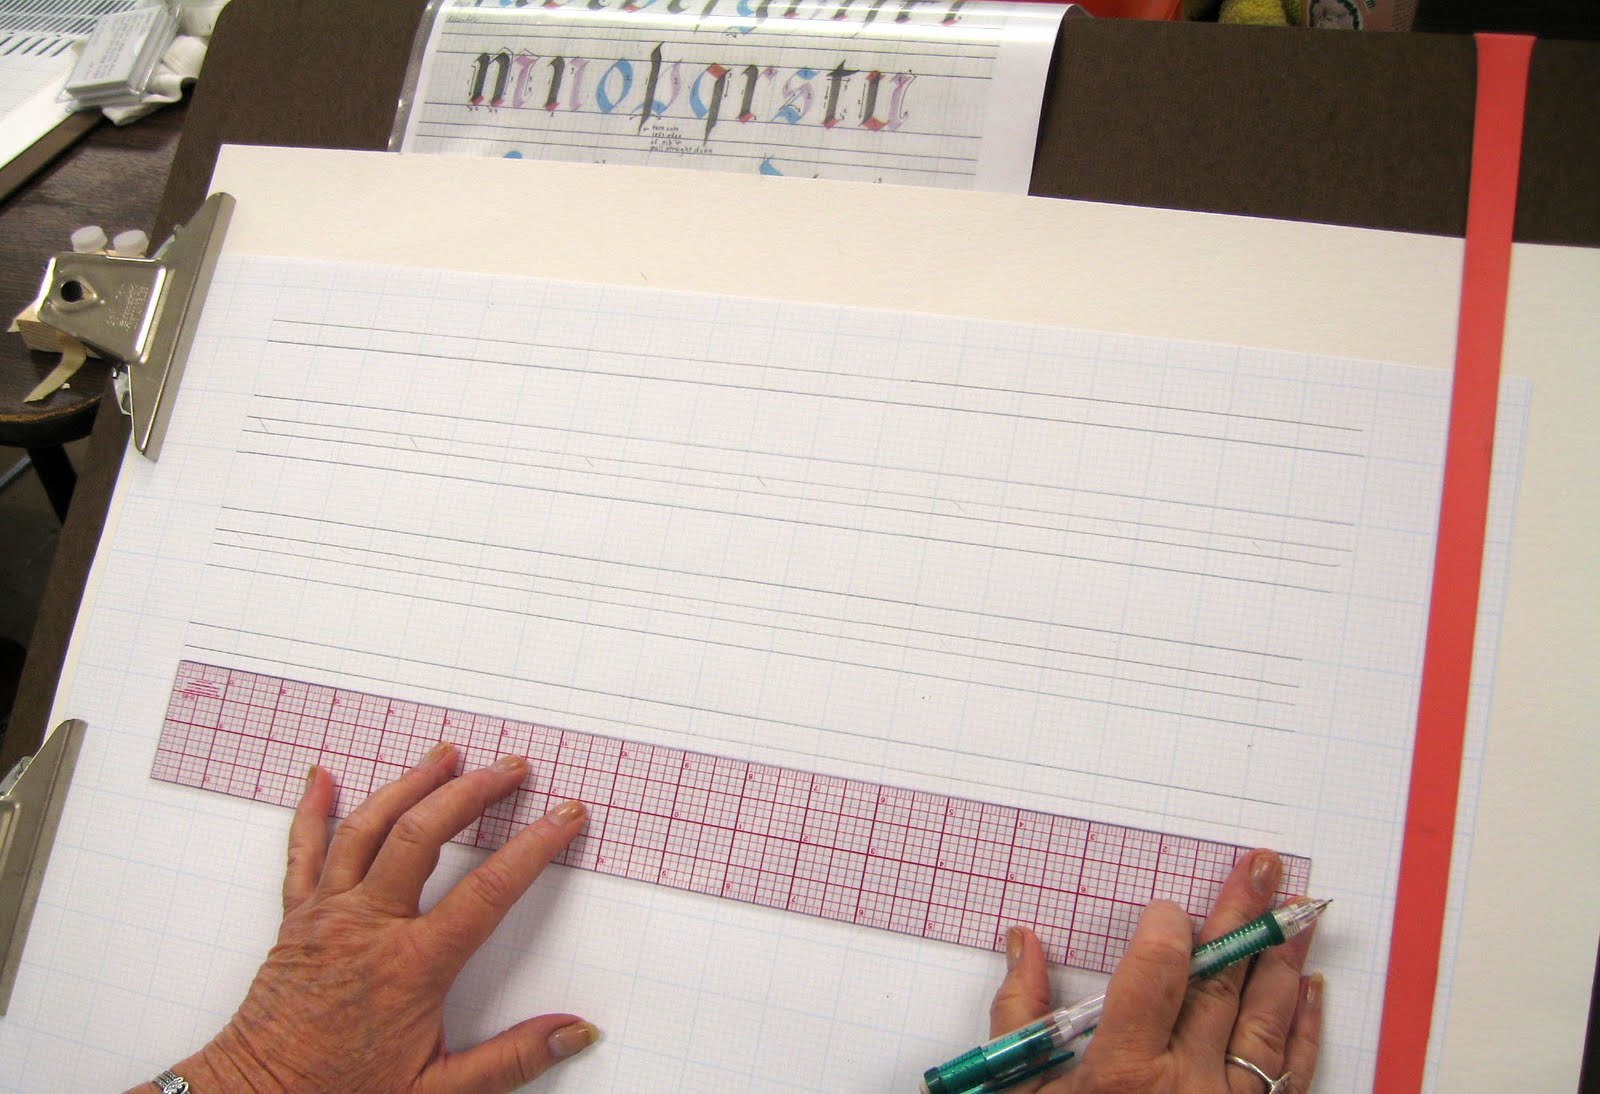
For the 5mm Brause , the x-height (width between waist to base) for Fraktur is 5 pen widths (not to be confused with boxes on the grid paper), which is 1-inch or 8 boxes on the grid paper. The space from the waist to the ascender is 2 pen widths, which is 3 boxes; the space from the base to the descender is also 2 pen-widths, or 3 boxes. The ascender is also called an extender. Line the sheet so that the darker-blue (or thicker black for the Bee Paper) lines will form the x-height every other inch. Then divide the 8 boxes in-between in 3-2-3 boxes; the first 3 are the descender, then 2 boxes for inter-linear space (space between lines of writing), then 3 boxes for the ascender of the next line. DeAnn suggests lining the paper once, then cutting that strip to create a template that you can just place against a clean sheet so you don’t have to measure each time.

DeAnn says: Practice is rehearsal! Set up your tools and yourself correctly so you can write in an organized fashion and learn good writing habits.

Only practice on 1-side of the Bienfang paper. Once written on, the sheet will pucker and the writing will be visible from the other side too. However, the Bee Paper with the black lines is thick enough that you can try writing on the back too. Note: One side of the Bee Paper has 8 boxes per inch and the other side has 10 boxes per inch.

Parallel pens: DeAnn prefers that beginning students practice exclusively with the chisel point nib, not markers or fountain pens. Markers can be made to write however you hold them, but DeAnn’s goal is to teach the correct way of writing the letterforms and she doesn’t want beginners to develop bad habits. Once you can write with the chisel point nib, you can write with anything. That being said, the parallel pen is a fountain pen with a good chisel point. So if intermediate students want to practice with the parallel pen, DeAnn has a few sizes available for sale.

Hints for Fraktur strokes:
Square: starting with the 45-degree pen angle, stroke in the direction opposite of pen angle, until the length is same as the width. This is the thickest your pen will write. Practice this without the serif to get an idea of what the square shape looks like.
Rectangle: start with the same 45-degree pen angle as the square, but stroke in a flatter direction.
Caution: don’t let the serifs get too curvy. You don’t want to obscure the vertical strokes.

Curve: start down at 1 whole pen width
Direction change: entrance serif, then a slight s-curve in the downstroke
Dot: like a comma; tiny bit of serif to start
To create the lowercase Fraktur letters, use these strokes to form the letters. Pay close attention to the Exemplar and compare it to your own letters. Pay particular attention to the white space (or inner space) of the letters like a, o, etc.
Notes on individual letters:

i : The vertical stroke doesn’t quite reach the waist-line. Until this period, “i”s weren’t dotted. The dot is also called a jot or tittle.
j : like the “i”, but pull the vertical stroke all the way to the descender, letting it end at the regular pen angle so that it tapers
l : start at ascender for the vertical stroke. You can put the square stroke decoration next (#2 stroke), then pull the top serif as #3. To make the thin line, use the left edge of your nib and draw the line using ink that’s pooled at the top of the vertical stroke. If there isn’t any pooled ink, squeeze some out of your nib by setting it at the beginning of the vertical stroke and pressing. Then draw out the line with the edge of your nib.
t : place the left side of the nib on the waistline to start the vertical stroke. For the crossbar, put the right side of the nib on the waistline, then pull the cross-stroke. Becase of the 45-degree pen angle, both angles should match.

o : should be about 5 boxes wide. Look at the white space (the inner space) carefully when comparing your letter to the Exemplar.
c : First, let’s do the alternate “c” at the bottom of the Exemplar, which is more similar to the “o”. For the ending serif, twist your pen so that you can draw a line downward with the left edge of the nib. Beginners, if that’s too difficult to do right now, don’t worry about it – leave it as a rectangular stroke. If you’re using the Brause wooden pen-holder, then you have to twist your hand; but if you’re using a pen-holder with a round ferrule, then you can roll it between your fingers.
d : for the alternate “d” at the bottom of the Exemplar – see where the left edge of the curve stroke is and move your eye upward so that you can start stroke #2 at the ascender with the same left edge but crossing it slightly.
q : for the rectangle stroke, match the left side of stroke to the vertical stroke. For the end, roll onto left edge of nib but you don’t have to do it for now if you can’t.
a : curve – rectangle – vertical stroke comes down toward the baseline, but just before it, take curve up just barely.
g : like the “q”, match the left side of rectangle stroke to the vertical stroke, which curves out at the baseline (similar to the “a”) but then stops. Rectangle stroke meets it for the lower stroke.
c and d from top of Exemplar: start a whole pen width (at 45-degrees) from the waistline to leave room for the rectangle stroke. Start with a slight serif and some curve. Then for the “c”, a rectangle stroke with decorative serif which goes down, NOT in. You don’t want to create a dark spot that will make it look like an “e”. For the “d”, start the last stroke at the ascender with the same left edge as the first stroke.

b : start the vertical stroke at the ascender (this is also called the stem stroke). For the direction change stroke, start the serif at the stem stroke about ¼ away from the waistline. If you start too low, the white space maybe too narrow. The last stroke is a “thorn” – this type of decoration will also be used in the capitals.

e : like the “c”, start one whole pen width (at 45-degrees) below the waistline. Then the rectangle stroke goes all the way in. You can also write an alternate “e” similar to the “c” at the bottom of the Exemplar.

f : start one pen width (at 45-degrees) below the ascender. You can stop the vertical stroke as it approaches the descender or twist onto the left side of your nib to make the serif. Be careful not to make the rectangle stroke look like a flag blowing in the wind. The cross-stroke at the waistline should end at the same right edge as the rectangle stroke.

h : the square stroke is a decoration, so don’t overdo it. The direction change stroke goes down to the descender.
k : Alternate stroke sequence – you can do the square stroke second, then the serif for the vertical stroke.

m : start at the waistline with a small serif, then make vertical stroke – square – then hairline that goes up and then over – square – then hairline into a rectangle stroke that ends into a vertical stroke with an exit serif.
n: like the second half of the “m”; white space inside should be similar to that of the m.
p : start at the ascender, like a flame at the top, then into a vertical stroke that you can stop or roll onto the left edge of the nib to taper off. The final rectangle stroke has a curvy entrance.

s : think of the “s” within an “o” to achieve the correct width. Practice the first two strokes on top of an “o”.

v : the first stroke is like the second stroke of the “o”. When writing the direction change stroke, look at the point where you want it to meet the rectangle stroke.
w : start with a hairline at the waistline, then curve slightly above it before pulling the stroke toward the baseline. Then the rest is the “v” twice.
x : start at the waistline with a hairline, then over and down and over again, ending with an exit serif. Stroke 3 is like a square beginning with a hairline from the stem stroke. The cross-stroke should end at about the same right margin as the bottom corner of the square stroke.
y : live the “v” except swing the direction stroke beyond the rectangle stroke, then down to the ascender. Start stroke 4 with the same left edge as the rectangle stroke of stroke 2.
You can use the alternate letter forms within the same text. Depending on the letter-order or spacing, one form may be a better fit. Experiment!

Be aware: are all the white spaces the same? For example, the inner space of the “a” should be the same as that of the “o” and “n”. Don’t overdo the serifs on the square and rectangle strokes. It may be better to leave off the serifs for now to concentrate on the letter forms themselves.
Cleaning the Brause chisel point nib: Usually, wiping off the nib is enough between practice sessions. But if it has become crusty with dried ink, then it should be rinsed in water. To remove the nib from the holder, hold the nib in a rag – the sharp metal of the nib can cut your finger – and pull it out of the holder. Still holding the nib in the rag, then pull the reservoir off of the nib. Don’t let the reservoir wash down the drain! Put it aside. Wash the nib under running water and dry it off – because Higgins Eternal ink is not waterproof, it should eventually dissolve off the nib when it’s washed. Use an old soft toothbrush if you need to scrub it some more.
Putting the nib back together: Make sure the nib and reservoir are dry; then put the reservoir on your finger (flat side down). Place the nib into it and hold onto the reservoir with your thumb and first finger as you push the nib back in .
HOMEWORK: Practice the letters this week. If you feel comfortable with them, beginners can start writing words. Go to DeAnn’s website to get the list of “Words to Use for Spacing” which are words that emphasize spacing issues between letters. DeAnn's website is http://www.designingletters.com/ Go to "About", then "About Calligraphy" and you'll see a list of Homework items.
Intermediates can go ahead and write alphabet sentences after writing the letters and then the words.
TIP: Try to practice 15 minutes a day, rather than an hour Sunday night before class. A little more often is better practice than a longer session just once a week.
No comments:
Post a Comment