
Today DeAnn reviewed the friendship exercise and banner. She then demonstrated Copperplate basic formal capitals.
Review of “friendship” exercise: Issues that students found difficult were spacing and making all the downstrokes the same thickness. Another issue was making all the strokes be the same; for example, making all the #6 strokes the same. DeAnn will be correcting these exercises in detail. She highly recommended that anyone who hadn’t done the friendship exercise find time to work on it. She feels that it helps you to take your Copperplate to the next level, as it really makes you learn how each stroke looks.

DeAnn’s tip: the larger you’re writing Copperplate, the thicker the downstrokes have to be.
If you’re doing Copperplate for reproduction (e.g. for an invitation), the hairlines can’t be too thin or they’ll fall out when reproduced. Also, you’re usually writing at a larger size for reproduction, so if the hairlines are too thin, they’ll disappear when the piece is reduced.
Homework notes: For letters like n or p, remember to start the #2 or #4 strokes from the baseline.

For the “o”, there should be no pressure on the right side of the center of the letter.

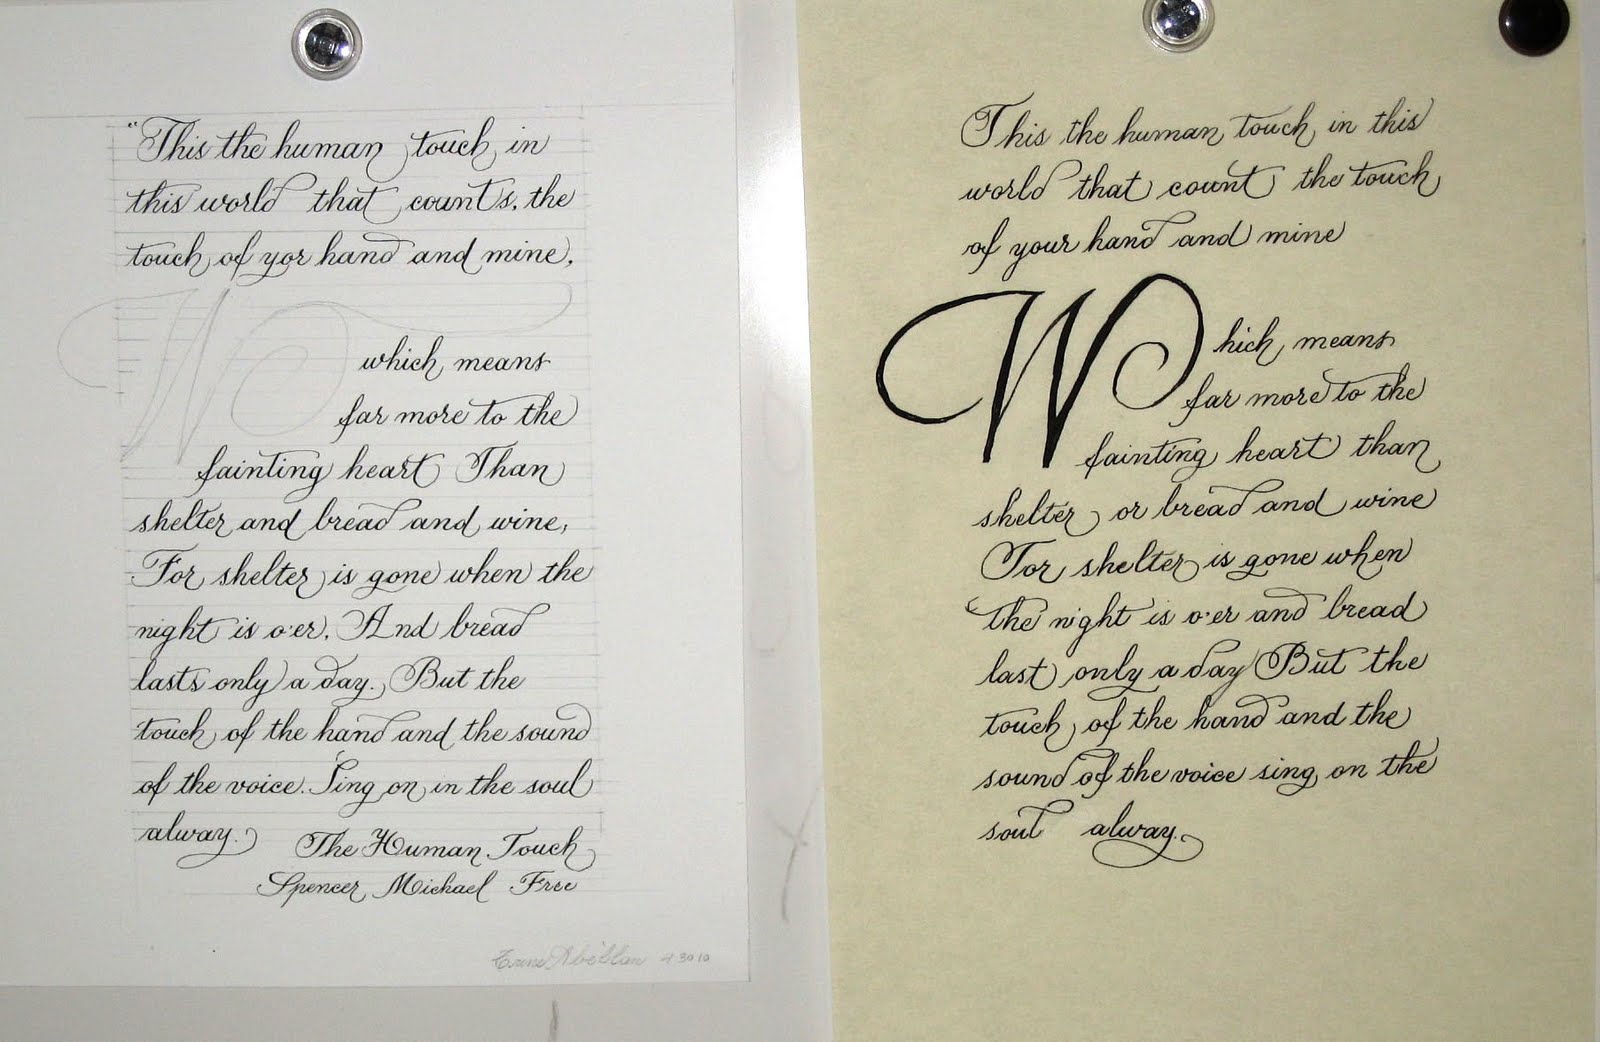
Project: Satomi wrote out a sample on the pergamenata paper – it was 70 words. So the text you choose should be about that length. However, if it’s too long, just stop when you come to the end of the template. Don’t worry about finding text that will fit exactly. DeAnn is more concerned about how it looks. Choose text where you like the initial capital letter – this will be what’s decorated.

Question: Is the entrance stroke always necessary? (for example, on an “a”)
DeAnn: You should practice always having an entrance stroke. This is more formal. Once you become more proficient, you can decide whether or not to include the entrance stroke based on the context and the letter that comes before it.
DeAnn took a poll of students’ favorite nibs:
Gillot 1068 – 5
Brause Steno – 2
Hiro 40 – 2
Brause EF66 – 2
Copperplate Capitals: the size is from the base to the ascender. For demonstrating them on the board, DeAnn didn’t write in the waist guideline. See the handout.
When writing the capitals, think OVAL for the strokes. Many of the letters can be visualized as a combination of ovals.


Remember: Flourishes should be BIG!
Notes on individual letters:
A: starts at the bottom at the baseline with a terminal dot.


I: Think of the secondary stroke as an oval shape.
J: Primary stem stroke goes down to the descender
K: the secondary stroke should be parallel to the Primary Stem stroke
L: curve last stroke back into itself, not off into space. You want your eye to be brought back into the letter.

N: start at the bottom at the baseline with a terminal dot. Think of the downstroke as an s-shape. The final upstroke ends in a terminal dot above the ascender line and should be parallel to the initial upstroke.
O: Think of the letter as a big oval with a curvy flourish to end it


R: the secondary stroke should be parallel to the Primary Stem Stroke
S: similar to the “L” but ends with a terminal dot

U: the initial stroke curves back slightly, it doesn’t go straight down. Start the curve early so that you have a nice big triangle

W: start with a #4 stroke that ends in a diagonal upstroke. Like the “V”, but don’t put too much white space between the “V”-spaces; letter should be pretty narrow.
X: First stroke ends in a terminal dot. Second stroke should overlap at the center, not be double-wide through the center. If you find that difficult, then don’t pressurize the second side.


Z: this is DeAnn’s modern version of a “Z”. The last touch is a “carrot” flourish: set – press – pull and release.

Alternate "Z"s:


Observe where those ovals sit in relation to the letter. Practice drawing ovals in the air with your whole arm to get a feel for them. The capital letters should not have small flourishes.
Addressing Envelopes using the Ampersand symbol: all these symbols for “and” are variations of the Latin “et” which means “and”.


Numbers: all sit on the base line and are slightly taller than the waist. By the time Copperplate was developed, we were writing Arabic numbers with Latin letters, so they didn’t really go together very well. Numbers could be “made up” to go with various calligraphic hands.


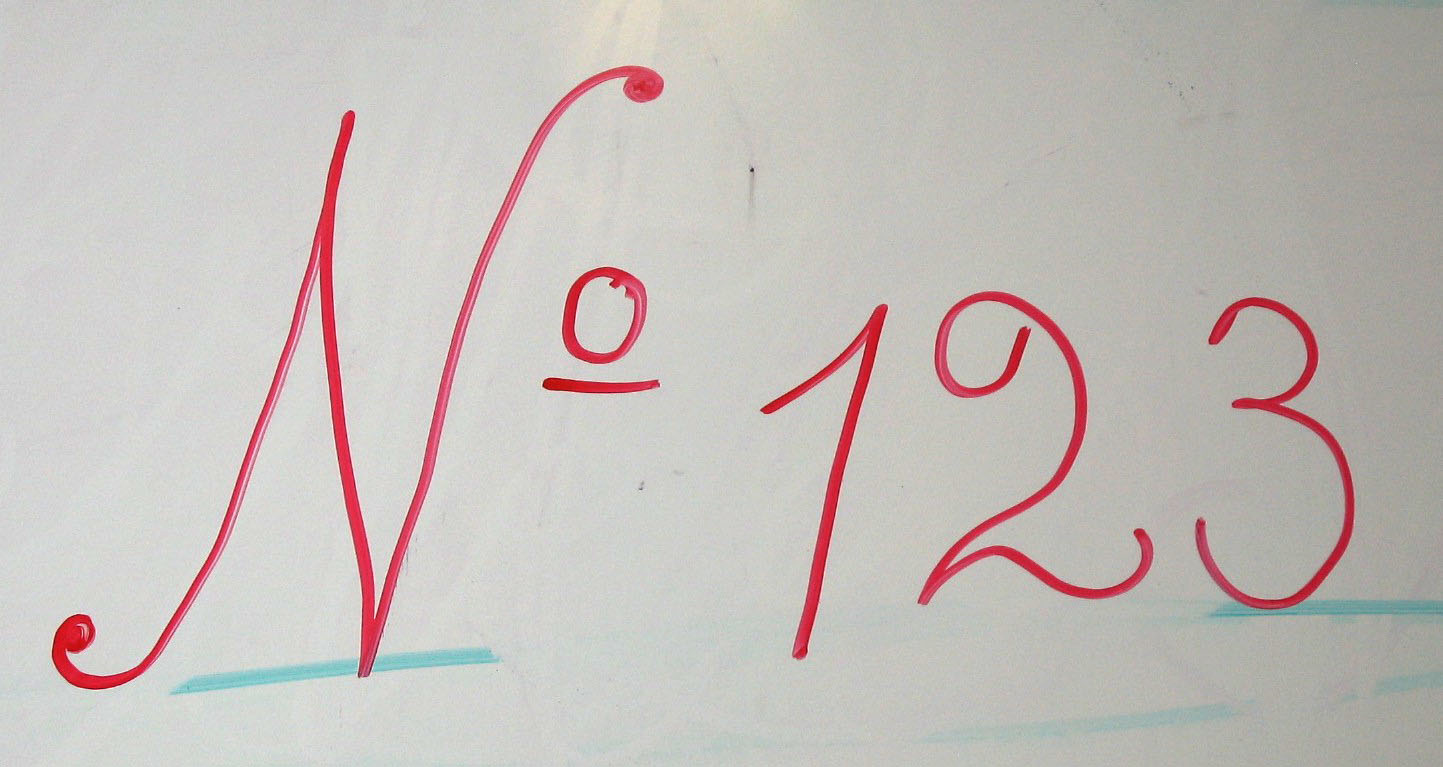
A graceful way of putting “#” on an address: use “No”
Old-fashioned way of writing numbers, where some dropped below the baseline:

Some Capitals are connectable, meaning they can end in the entrance stroke to the next letter, but others aren’t.
Connectable Capitals: A, F (both), H, I (both), J, K, M, R, U, X, Z


HOMEWORK: Practice writing Capitalized words. Never write Copperplate words all in capitals! See DeAnn’s website for alphabetical Flower Names.
No comments:
Post a Comment