
DeAnn introduced herself and gave a short history of Copperplate. At the time it was originally in use, it was called Roundhand and appeared in England, France and some of Italy in the 1600s. Around 1900 it had become almost a business style of writing and then several different methods developed, such as Palmer, Spencerian, Zaner-Bloser.
DeAnn’s Philosophy for learning Copperplate: For success in writing beautiful Copperplate, think of the Copperplate letters as a series of STROKES, which you’ll be learning in today’s class. By disassociating them from the letters you’re familiar with, you can avoid common mistakes that could make your Copperplate letters look like cursive writing.
DeAnn distributed supplies and handouts. The handouts are the Copperplate Exemplar, nib chart, and large guideline sheet. We will be starting out using the Gillot 404 nib and Vermillion ink. The Gillot 404 nib has a ridge that distinguishes it from the Gillot 303.

Preparing your supplies for ease of transportation: pour ink from their containers into the dropper bottles. Start with the Vermillion ink (the Higgins Eternal ink needs to be mixed with the gum Arabic so DeAnn will go over that recipe next session). The dropper bottles are leak-proof so bring those to class; it’s OK to leave the original containers of ink at home. From the dropper bottles, fill one of the ink wells (or “dinky dip”) to at least the ridge-line. You want to be able to dip your pen and cover the nib’s reservoir area (“eye of the needle”) completely.

Preparing the Pen: Put the nib into the oblique pen holder so that the “eye of the needle” (the opening in the nib) points directly upward. The fit may feel tight, but push the nib in at least halfway for a secure hold. Hold the oblique holder as you would normally hold your pen, with the angled nib to the left side. If you have a brand new nib, you’ll need to prepare it by rubbing gum Arabic all around so that the ink will adhere to the nib and not just bead-up and slide off. New nibs usually have a waxy coating and you may have to rub with gum Arabic several times until the ink will stay in the reservoir. NOTE: Vermillion ink will rust your nib, so wash it off with water after you’re done practicing.
Preparing the paper: Make a crease in the cover of the cotton comp paper pad about an inch down from the top. Fold this back so that you’ll have a flat writing surface without the cover bunching up to the left. Place the guideline sheet underneath the first sheet.
Guideline sheet: We’ll be starting with the large 1/4-inch guideline sheet. 1/4-inch refers to the x-height, the space between the waist and the base. These lines are indicated by the black box on the left margin. The line above the waist is the ascender, the line below the base is the descender. 3:2:3 at the bottom of the guideline sheet refers to the ratio of the spaces between the horizontal lines. 3:2:3 is the same as 1:1.5:1. If the x-height (base to waist space) is considered 2 units of space, then the ascender & descender lengths are 3 units of space. The 35-degree slant lines are there as guides for the angle of writing, not for spacing.
TIP: DeAnn suggests highlighting the waist to base space so that it’s easier to distinguish as the line to write on underneath the cotton comp sheet.

Prepare your work space: The key to being able to write Copperplate correctly is to set up your work space correctly and sit in the right position in relation to your paper. Position the paper so that the slant lines are pointing toward your stomach. This angle may seem extreme, with the paper pad almost at right angles to the table’s edge, so you need to position yourself so that your elbow rests completely on the tabletop, which means you’ll probably have to sit at an angle to the table edge so you’re not twisting your torso. Place the ink well above the paper pad and tape down to avoid accidental spills. Place your exemplar in front of you, preferably in a stand like a Page-Up, so it's easy to refer to.

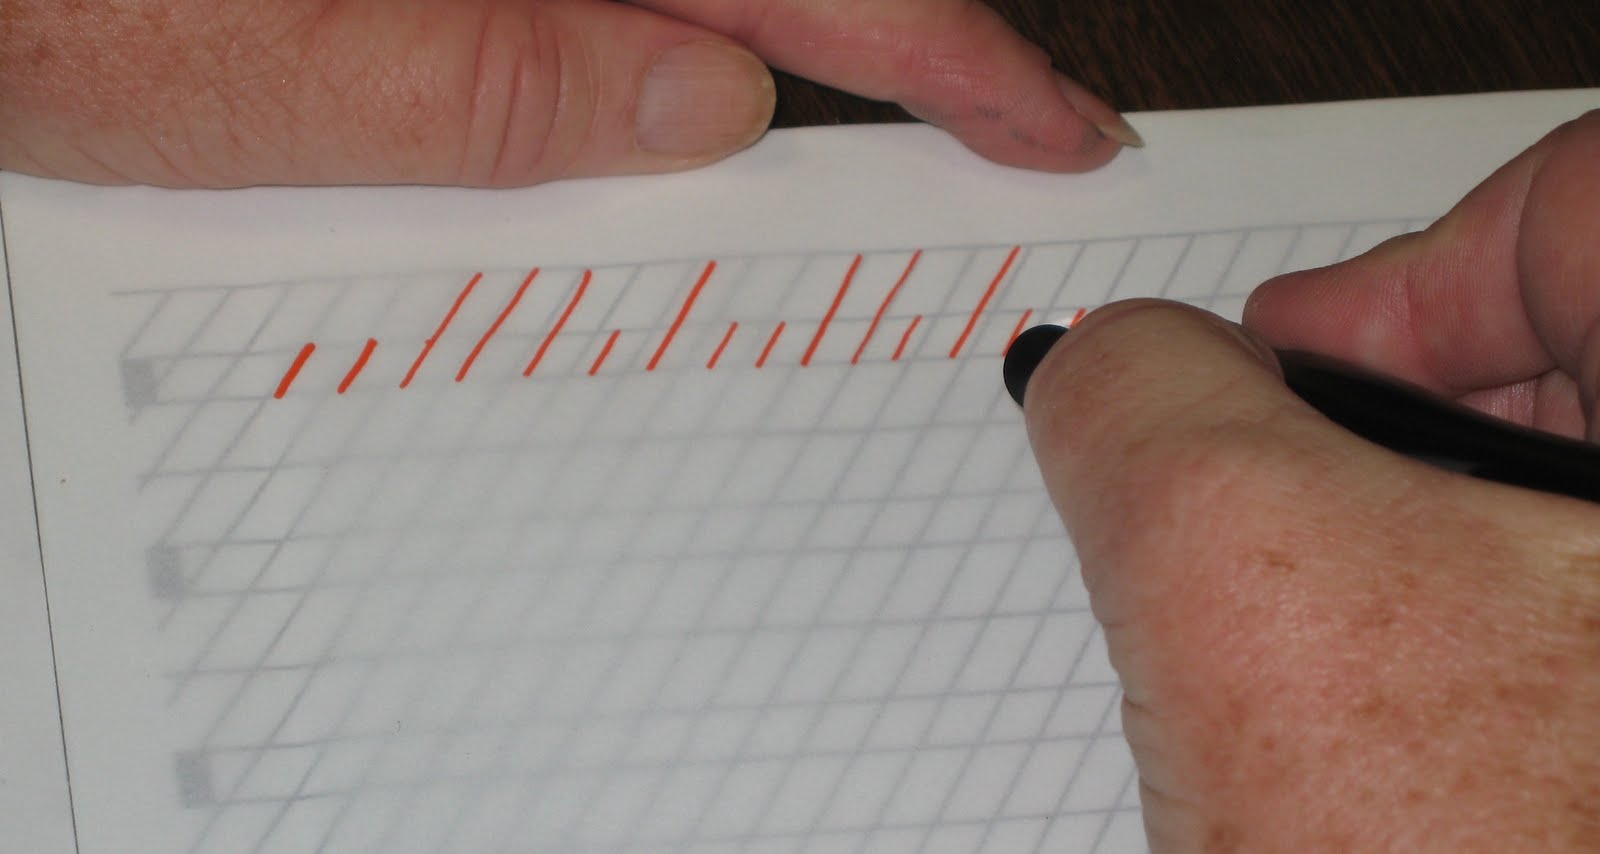
1. Write straight lines (with slant)
2. Pen should be in the direction of the slant lines
3. To create the square top & bottom edges, set – press – pull – stop – release
4. If the nib is sticking into the paper, adjust the angle of how you’re holding the nib. Lowering the angle may help.

Notes on individual strokes:
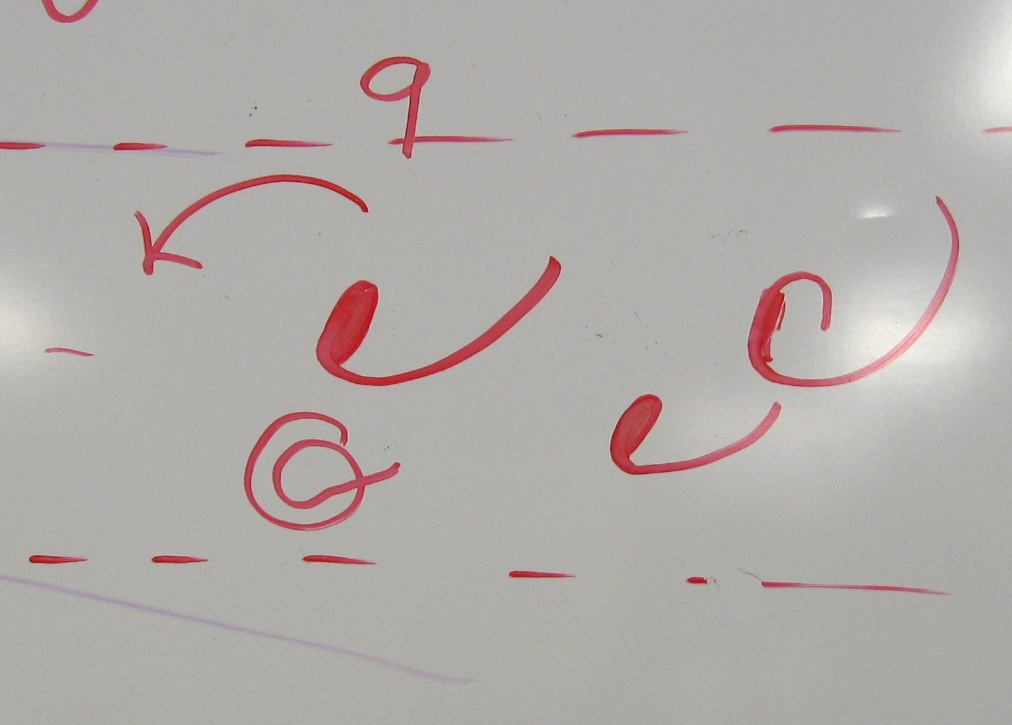
1. #2, #3, #4: the up strokes and the down strokes should be parallel and also parallel to the #1 strokes.


4. #2, #4: start the curve with no pressure, build up to full pressure by midpoint on the down stroke.


7. #8: start at 3:00 and think of it as an oval shape, more hot dog than hamburger. It’s thickest through the center. The inner white space should match the width of #2, #3, #4 strokes.
REMEMBER: Don’t get overwhelmed! If you get really anxious, go back to the last step you were comfortable with and practice that. You can even practice the Copperplate strokes with a pencil if it all seems to be too much at the moment.
HOMEWORK: Continue practicing the strokes with the Vermillion ink and Gillot 404 nib. Memorize the basic stroke numbers – DeAnn will test you next week. If you feel really comfortable with the Gillot 404 nib, you can try out another nib and see how it’s different frm the Gillot 404. Be sure to note on your nib chart that the Gillot 404 is “medium sharp, medium flexible”.
NOTE: On your practice sheets, write the nib, ink type, and date in the lower right corner.
Homework for intermediates: write the strokes and letters as perfectly as you can this week. DeAnn will then give a thorough critique. Start thinking about text you want to use in the project.
No comments:
Post a Comment